Adventures in Decaling
 |
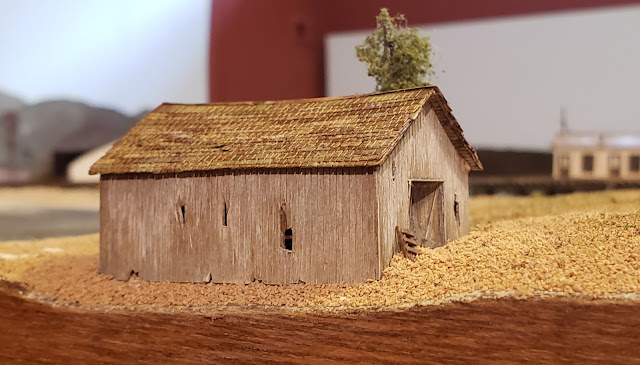
A close up picture like this highlights the mistakes. This is the first of a series of resin kits, I'm hoping the others look better. I'll definitely work on sanding the molded-on details down on future version.
|
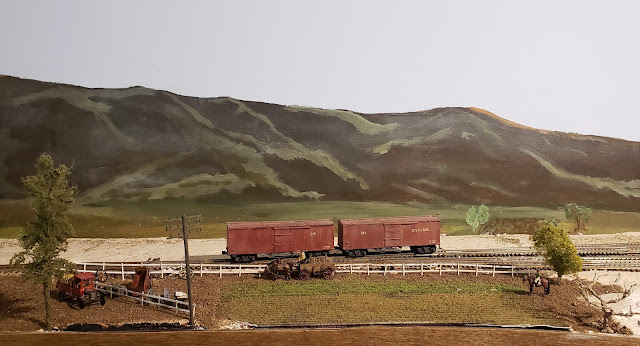
This is Part II (of.. III?) of the story of building PVCRR #220.
Part I can be found here.
In my nearly 30 years of making models, I've tried a number of methods for applying decals, with varying degrees of success. From what I can tell, everyone has similar methods, so why not share mine? What follows is my current method, for better or worse.
Also, I say 'dee-cal' (cal sounds like the beginning of California), I've heard some people say 'deck-awl' which is simply bizarre to me.
Ok my quick guide to applying dee-cals to models-
 |
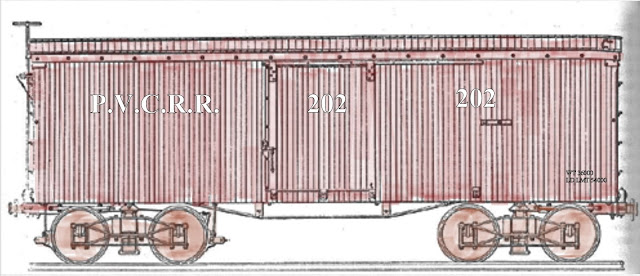
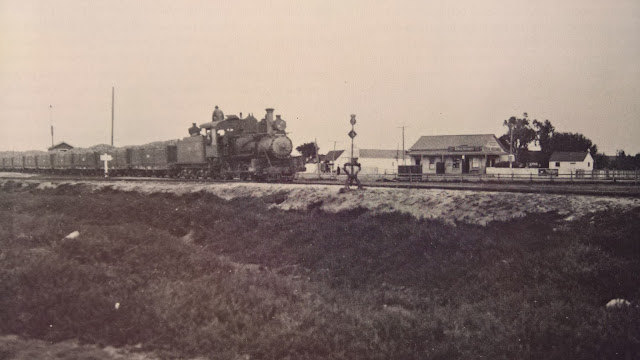
Photograph found in Steinbeck Country Narrow Gauge, courtesy Monterey County Historical Society.
|
To letter this kit, I've been working off of the above picture. I had some custom decals printed from Modeler's Decals and Paint. They print a 3.5"x7" sheet (in white!) for $9. They look great, and arrived quickly, hard to beat that. So far, this is the only picture of #220 I've been able to find, so some assumptions were made as to the placement of the letters and numbers. For example, I found other cars with numbers in the center of the car ends, and others with them located to the left of the brake wheel. For this car, I located them in the center.
To begin the finishing process, I sprayed the finished model with a coat of primer (I believe this was Testor's Flat Light Aircraft Gray #1233). The model is comprised of various materials - styrene, resin, metal, and wood. The coat of primer creates a uniform finish to work with.
After the primer dried, I brush painted the model with Tru-Color Paint's PRR 1948 Passenger Car Tuscan Red, and allowed that to dry. I didn't put a solid coat on the wooden roof of the car, knowing that would be weathered and sanded to expose the wood. Instead, I drybrushed it to varying degrees of coverage. I don't know what color these cars actually were. Anyone who's spent time looking at paint at a hobby store knows there are a number of variations on "boxcar red" or "boxcar brown" and half of the reds look brown, and half of the browns look red, so I just picked a color I like.
Prior to installing the decals, I sprayed the model with a coat of clear gloss from Rust-Oleum. This gives the decals something smooth to attach to, preventing air from getting caught beneath it as it would on a flat finish (which is rough in texture, giving the air molecules small pockets to hide in). This trapped air is what causes "silvering," which is what you call it when the film around the decal is visible on a finished model.
 |
Temporary Kitchen Table Work Station
|
For the decals, the basic idea is to soak the decal in water, place it on the model, slide it off of the backing, and let it dry. It's simple. Usually.
On top of the clear gloss finish, I apply Micro Set by Microscale, meanwhile I soak the decal (Tip: cut the decal out using a razor blade/x-acto knife on a piece of glass to get a clean cut.) in distilled water for about 10 seconds. Not tap water. Distilled water from a jug that you can get at the grocery store for $1 or so.
Using pointed tweezers, I position the decal on the model where I had earlier brushed on some Micro Set. Using a bit of paper towel, I blot away the excess solution once I'm happy with the placement. I repeat this step until I finish with one side of the model. Well, that's what I should do, in actuality, I decaled the entire box car, while trying not to ruin my work through handling the model.
 |
Watching them dry.
|
Don't even look at it.
If you look at it, you'll find a mistake and try to fix it, and cause more damage the decals. Don't worry about the flaws, they will be fixed* through weathering.
Just put it down, and walk away. Let the model sit over night, go finish Season 1 from earlier.
Now that it's tomorrow, how terrifying is Wilson Fisk? Ok, once the model is fully decaled, I apply a clear coat (Testor's Dullcote) to seal them. This is the stage of the photo at the top of the page. As you can see, the edges of the decals are still visible. I think I should have applied a second coat of Micro Sol and let them the car sit another day. Unfortunately, I didn't notice this until I applied the Dullcote, essentially sealing the decals.
That's where the model is at today. I'll make some changes to the process on the next car, and hopefully hide that film a bit better. In the meantime, I'll work on weathering and finishing the model.
Products Used (in order):
Testor's Flat Light Aircraft Gray #1233 (spray can)
Tru-Color Paint's PRR 1948 Passenger Car Tuscan Red (brush painted)
Rust-Oleum 2x Ultra Cover Gloss Clear (spray can)
Microscale Micro Set
Modeler's Decals and Paint (Custom Decals)
Microscale 60-2 Black and White Freight Car Data (Car Data Decals)
Microscale Micro Sol
Testors Dullcote Lacquer (spray can)
*By fixed, I mean of course, hidden.
Comments
Post a Comment